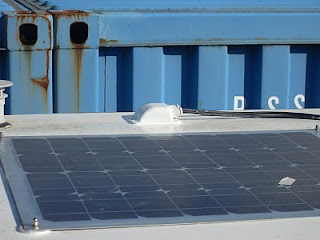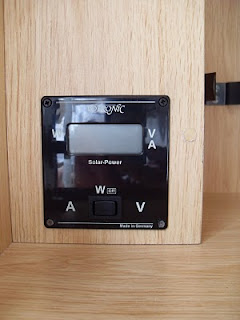
The Amperor 70 watt solar panels are an extremely neat power solution for Motorhomes,Caravans & Narrowboats. Instead of a bulky frame and fragile glass top, the Amperor panel simply bonds to the roof. Once it is there it will be barely noticeable, and it is tough enough to walk upon with soft-soled shoes. This guide describes how to fit 2 x Amperor 70 Watt solar panels to a roof, along with a Votronic MPPT 150 charge controller & SDP1 display panel.

You will need the following tools
• Pencil
• Drill with ½” bit
• Sandpaper
• White spirit
• Wire to carry 20 amp current
• Soldering iron & heatshrink tubing, or “chocolate block” wire connectors
• Screws & screwdriver for mounting controller
• Adhesive
A Multimeter can be used for checking the installation
Preparation
1) Choose a location for the panel. The surface to be bonded to does not have to be completely flat, as the panel is flexible. However, the panel won't bend to very tight radii or round sharp corners. Other factors to consider are: proximity to the battery bank, to minimise the length of connecting wires; how the wires will be led from the battery bank to where they pass through the roof, and minimising shading of the panel.
2) Lay down the panel on the roof, and draw round it with a pencil. Mark the positions where the wires exit the panel.
3) It is important that the area to be bonded to is clean and sound. If needed, the surface should be lightly sanded to provide a 'key' for the adhesive for the corner mounts. Patches of bare steel are fine - the adhesive will bond well to metal.

4) Drill one hole for the wires. Note that there is a blob of sealant around each wire, so the holes have to be made wide enough to allow the panel to sit flat on the roof. And if you choose to use the mounts an additional four holes will need to be drilled for each corner
5) Wipe the area down with white spirit to remove any dust and grease.
6) Lay the panel down to check that it fits snugly before continuing.
Laying the panel
You will need at least two people for this part of the job.
1. Attach the mounting adapter to the solar panel and lightly tighten the nuts to hold them in place.
2. Position the panel on the roof in the final position, and mark round the adapters with a pencil
3. Lift the panel and rub the area below the adapters with very fine sand paper being careful not to rub though the surface coating, clean any loose dust away from the area you have cleaned.
4. Reposition the panel and lift one corner at a time and remove the tape from the bottom of the adapter and firmly place that corner down onto the roof, do this with all four corners.
5. Loosen and remove the nut from the panel and gently lift the panel off the adapter.
6. Puncture the end of the adhesive with the tool provided place the top of the adhesive securely into one of the holes in the adapter, insert the end of the tube into the split on the tool, at slow pace turn the tool and inject the adhesive it the adapter until it flows out of the other hole in the adapter. Clean any excess adhesive away.
7. Reposition the panel and lightly tighten the nut in place allow the adhesive 24 hours to set before firmly tightening the nuts securely down remembering not to over tighten the nuts.
8. There are several ways to attach the cable from the panel by cleaning the roof along the cable path, gluing a piece of small square trunking to the roof and running the cable thought it remembering to seal the ends to stop wind noise, or you can run a bed of adhesive along the path you require the cable to run and bed the cable down onto the adhesive, after it has set you can run a further bead of adhesive to ensure the cable is held securely to the roof.
9. To install a cable gland make sure the cable is entering the van in an area that is concealed from view but you can get access to the roof, ensure there are no other cable runs that can be damaged. Mark the position on the outside of the roof clean and mark around the base of the gland using a suitable hole saw, cut into the roof after the roof has been cut it is advisable to use a grommet to protect the cable from damage as it passes thought the hole, feed the cable in thought the cable gland and down though the hole in the van roof with your adhesive glue the gland to the roof securely and allow time for it to set. I recommend that after it has set go round it with another bead of adhesive including round the cable entry’s on the glands.

Wiring
1) Decide on a location for your solar controller, and mount it using the screw holes provided. Almost anywhere will do, although it is good to minimise the wire run to the battery from the controller.
2) Run two lengths of wire from the controller location to where the positive (red) and negative (black) wires will be protruding an inch or so under the roof below the solar panel. This may mean installing some conduit, or removing panelling to run the wires behind it.
3) Join the short panel wires to the new lengths of wire with solder and heatshrink, or with 'chocolate block' connectors.
Solar controller
There is a detailed instruction manual supplied with the controller. However, connecting it is essentially just a matter of wiring the wires you have just run from the solar panel to the two terminals marked 'solar' + and -, and attaching another two wires from the 'battery' + and - terminals to the battery bank, preferably via a fuse board.
In most caravans and narrowboats appliances are wired via a common negative terminal block, and a fuse board for the positive wires, and these will probably be the easiest places to connect your solar controller to. However it can be hard-wired direct to the battery if preferred. If there is a master battery switch that cuts off power to the fuse board, this is the preferred option, as otherwise the solar panel will not be charging the batteries when the master switch is turned off.
Use a multi-meter to check it is charging the battery, by measuring the voltage with and without the controller attached - the battery voltage should be higher with the controller attached.
You may like to add the Votronics SDP1 between the controller and the battery to see how much current /wattage you are getting from the panel.
